
You signed up for ChatGPT Plus, enjoyed the upgrades, and now you’re ready to cancel. Maybe you’re cutting costs. Maybe you don’t need priority access anymore. Either way, canceling your subscription should take minutes, not mental gymnastics.
The reality? OpenAI updates its interface often, and the cancel option isn’t always where you expect it. Miss one step, and you could get hit with another monthly charge. That’s exactly what this guide helps you avoid.
Below, you’ll find the fastest, most reliable way to cancel ChatGPT Plus in 2026, plus screenshots, common pitfalls, refund rules, and answers to the questions people usually ask after they’ve already been billed. Let’s get it done quickly and cleanly.
Understanding ChatGPT Subscriptions
Before you cancel anything, it helps to know exactly what you’re paying for. ChatGPT has two main plans: a free tier and the paid ChatGPT Plus subscription. The free plan costs nothing and works indefinitely, so if you’re using that, there’s nothing to cancel.
ChatGPT Plus is a monthly, recurring subscription that unlocks premium features like faster responses, priority access during peak hours, and early access to new tools. Once you upgrade, OpenAI automatically bills your payment method every month until you manually cancel.
There’s no annual contract, no long-term lock-in, and no cancellation penalty. You stay in control, cancel anytime, and your Plus benefits remain active until the end of your current billing cycle.
How to Cancel Your ChatGPT Subscription
Here’s the key point: canceling ChatGPT Plus must be done through the web interface, as it isn’t available in the mobile app. Open ChatGPT on a laptop or desktop browser and follow these steps.
Step 1: Log In to Your ChatGPT Account
Head to chat.openai.com and sign in using the account tied to your subscription.
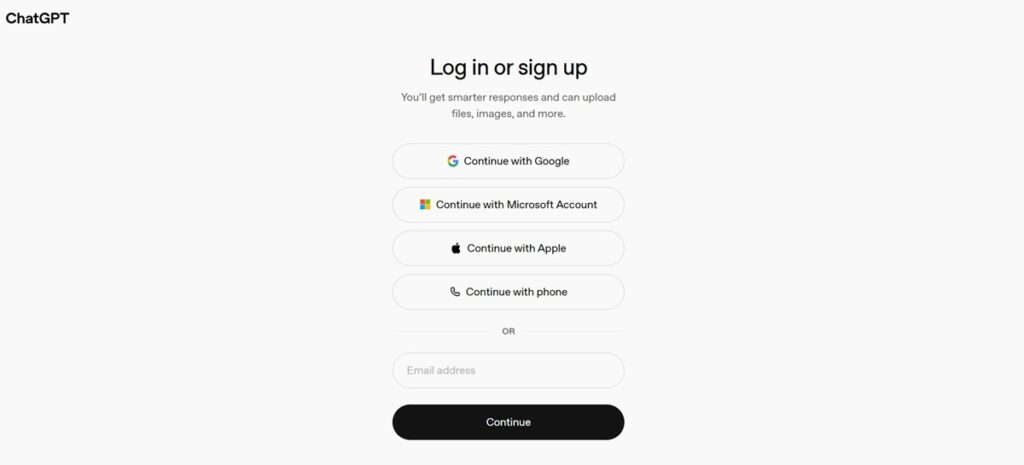
Make sure you use the right email, especially if you have more than one OpenAI account.
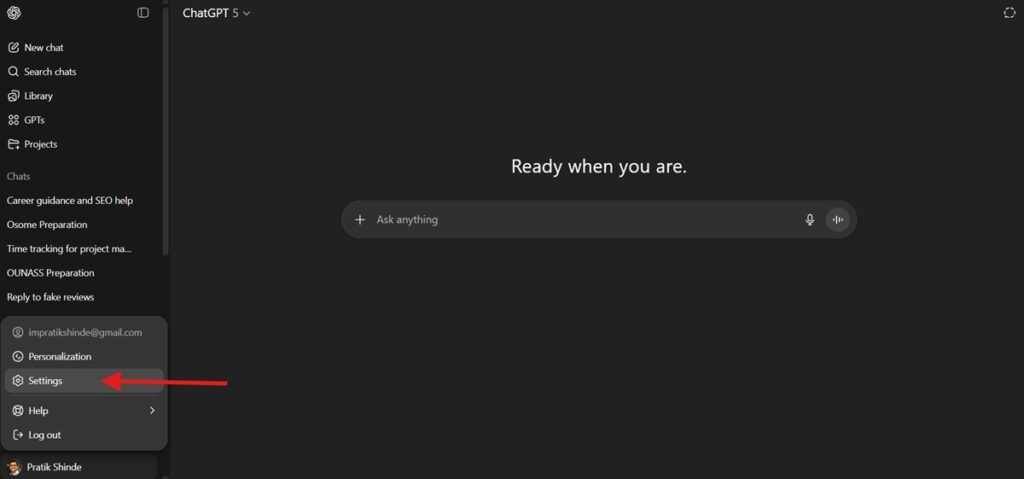
Step 2: Open the Settings Menu
Look for your name or email address in the bottom left corner. Click it, and a menu will pop up. From there, select Settings, which is usually near the bottom of the list.
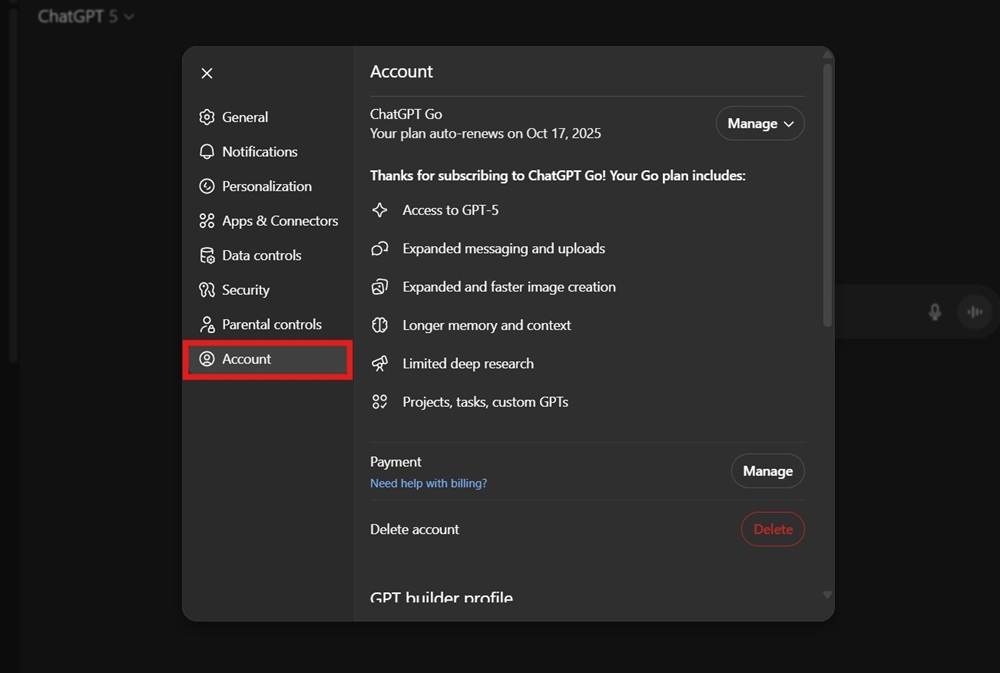
Step 3: Go to the “Account” Tab
Inside Settings, find the tab labeled Account. This section shows your current plan and billing info. If you’re on Plus, you’ll see “ChatGPT Plus” as your active plan.
Step 4: Click “Manage” and “Cancel Subscription.”
Click the ” Manage button on the top right and then click Cancel Subscription.
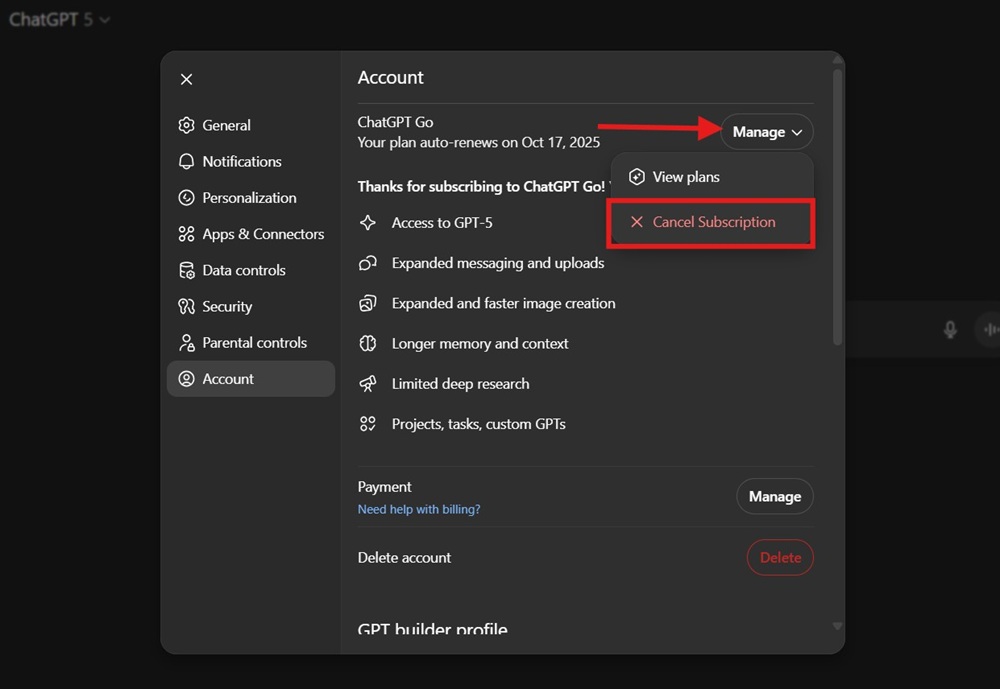
After that, you’ll see a Subscription Cancellation pop up. Again, hit the Cancel subscription button.
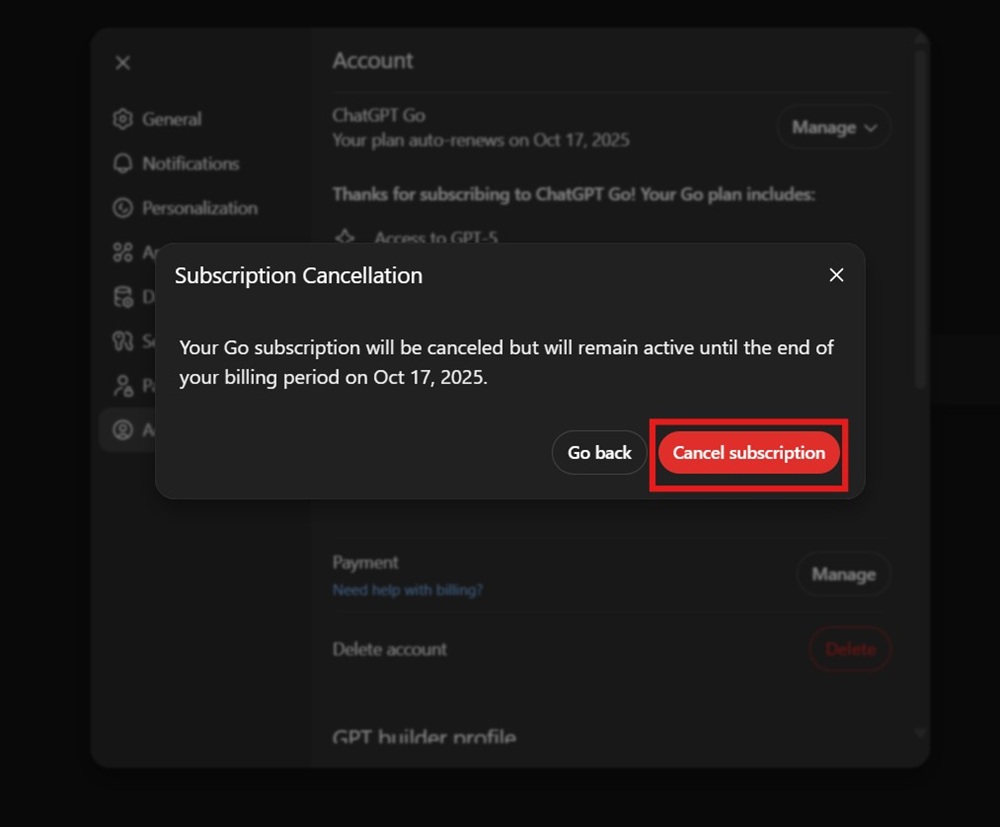
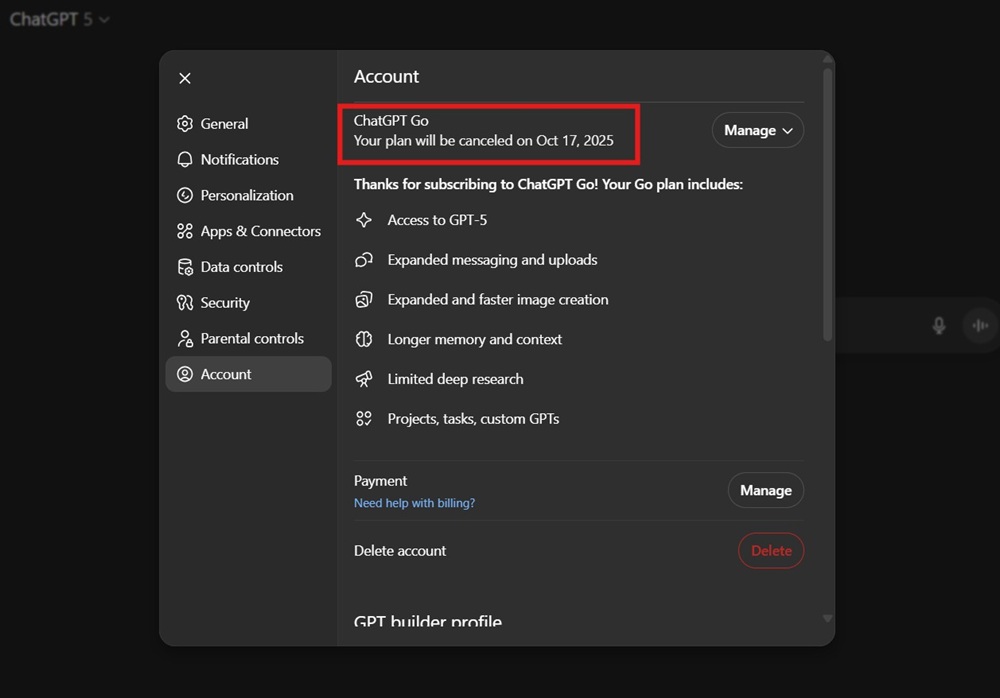
And boom!!! Your subscription is cancelled and you should now able to see a message in the Account section that your chosen plan will be canceled on a specific date.
Step 5: Double-Check for Confirmation
After canceling, you should see a confirmation email. Your plan will not renew and will be canceled, but it is still available until the end of your billing period.
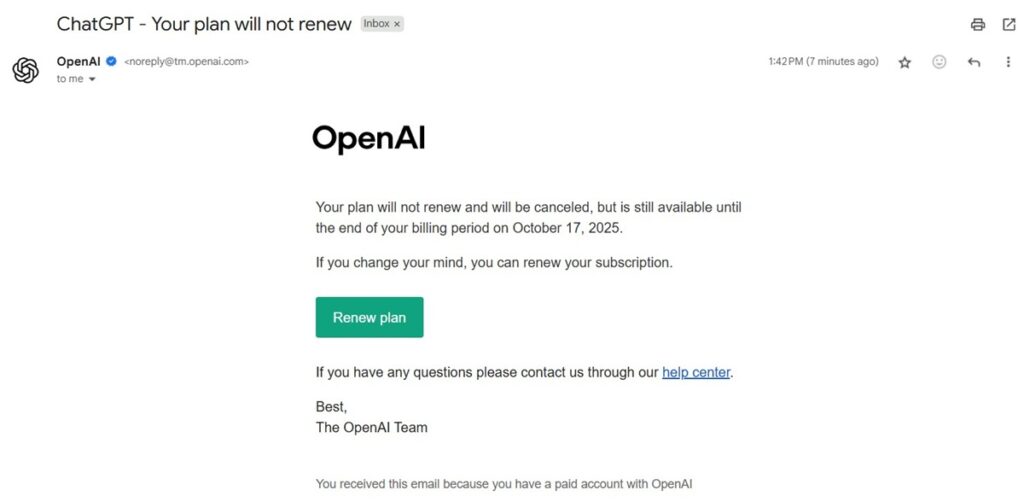
You won’t get refunded for unused days, but you also won’t be charged again.
Step 6: Log Out and Rest Easy
Once you’ve canceled, log out and relax. You can always resubscribe later if you miss those faster responses or priority access.
What Happens After You Cancel?
Canceling ChatGPT Plus doesn’t cut you off instantly. You keep all premium features until your current billing period ends. Once that date passes, your account automatically switches back to the free plan.
Nothing important disappears. Your chat history, saved conversations, and account settings remain intact. The only thing that changes is your access level.
Here’s exactly what you lose after cancellation:
- No priority access during peak usage hours
- Slower response speeds
- Limited or delayed access to the newest models and features
You can still use ChatGPT for free with no restrictions on basic functionality. In short, you’re downgrading your plan, not deleting your account.
Common Issues When Canceling ChatGPT Subscription
Most cancellations are smooth. But when things go sideways, they usually fall into a few predictable traps. Here’s how to avoid billing headaches and wasted time.
- No confirmation email: Check spam, wait a few minutes, then recheck your subscription status inside your account.
- Charged after canceling: You likely canceled after renewal. OpenAI doesn’t refund partial months, but you won’t be charged again.
- Cancel button missing: Log in to the correct account, try your original signup method, clear cache, or switch browsers.
- Canceled the wrong account: You’ll need to resubscribe, as subscriptions can’t be transferred between accounts.
Canceling ChatGPT Subscription on Mobile Devices
Right now, you can’t cancel ChatGPT Plus directly from the mobile app. You’ll need to use a mobile browser or a desktop. Open chat.openai.com in your browser, log in, and follow the same steps as above.
If you purchased your subscription through a third-party app store (like Apple’s App Store), you’ll need to cancel through your Apple ID subscriptions. That’s a different process from your iPhone’s Settings, tap your name, then Subscriptions, and find ChatGPT Plus there.
How to Check Your Current ChatGPT Subscription Status
Not sure if you’re still paying for ChatGPT Plus? It takes less than 30 seconds to confirm.
- Open Settings → Account → Subscription
- If it shows ChatGPT Plus, your subscription is active
- If it says Free Plan, you’re already canceled
You’ll also see your next billing date or the exact day your Plus access expires. If you’ve canceled, this date confirms when your account will automatically downgrade to the free tier.
How to Get a Refund for ChatGPT Plus
OpenAI’s policy is pretty strict; there are no refunds for partial months. Once you’re billed, you get Plus benefits until the end of the cycle, even if you cancel right after. If you believe you were charged in error, reach out to their support team with your account details and payment info.
For purchases made through Apple or Google, you’ll need to request a refund through their support channels. They have their own rules, so results may vary.
Final Thoughts: Canceling ChatGPT Plus in 2026
Canceling ChatGPT Plus in 2026 is refreshingly simple if you know where to look. A few clicks on the web dashboard, one confirmation check, and you’re done. No phone calls. No hidden traps. No awkward retention tactics. Just a clean exit when you no longer need the upgrade.
The best part? You don’t lose anything important. Your chats, settings, and account stay intact, and your Plus perks continue until the end of your billing cycle. If your needs change, reactivating takes less than a minute. That flexibility is exactly how subscriptions should work in 2026.
And yes, enjoy the extra cash flow. Whether that $20 goes toward software, coffee, or cloud credits, it’s yours again. Cancel smart, stay in control, and keep your tech stack lean.
Also, read more about –
- How to Use ChatGPT Plus for Free
- How to Change Your ChatGPT Password
- How to Delete a ChatGPT Account
FAQs About Canceling ChatGPT Subscription
Will I Lose My Data After Canceling?
No, your chat history and account info stay put. Canceling only removes the Plus features. You can keep using the free version as much as you want.
Can I Cancel ChatGPT Plus Anytime?
Absolutely. There are no cancellation fees or lock-in periods. Cancel whenever you want, and you’ll keep Plus features until the end of your billing cycle.
Does Canceling Stop Automatic Payments?
Yes. Once you cancel, OpenAI will not charge you again unless you resubscribe. You’ll see this reflected in your billing portal and confirmation email.
How Do I Contact Support If I Have Issues?
If you hit a snag, look for the Help or Support link in your ChatGPT web dashboard. You can submit a ticket or use the chatbot for basic help. For urgent billing issues, provide your account email and transaction details for faster replies.